
Wednesday 24 October 2012
Dreadnought base complete
The Dreadnought base has been finished. Very happy with the way it has turned out. Was exactly the effect I was going for. Now I just need to finish off a few missed details on the Dread itself (some lenses need finishing and the under slung weapons attaching) and it will be done and ready to crush foo's.
Wednesday 10 October 2012
Furioso Dreadnaught base WiP
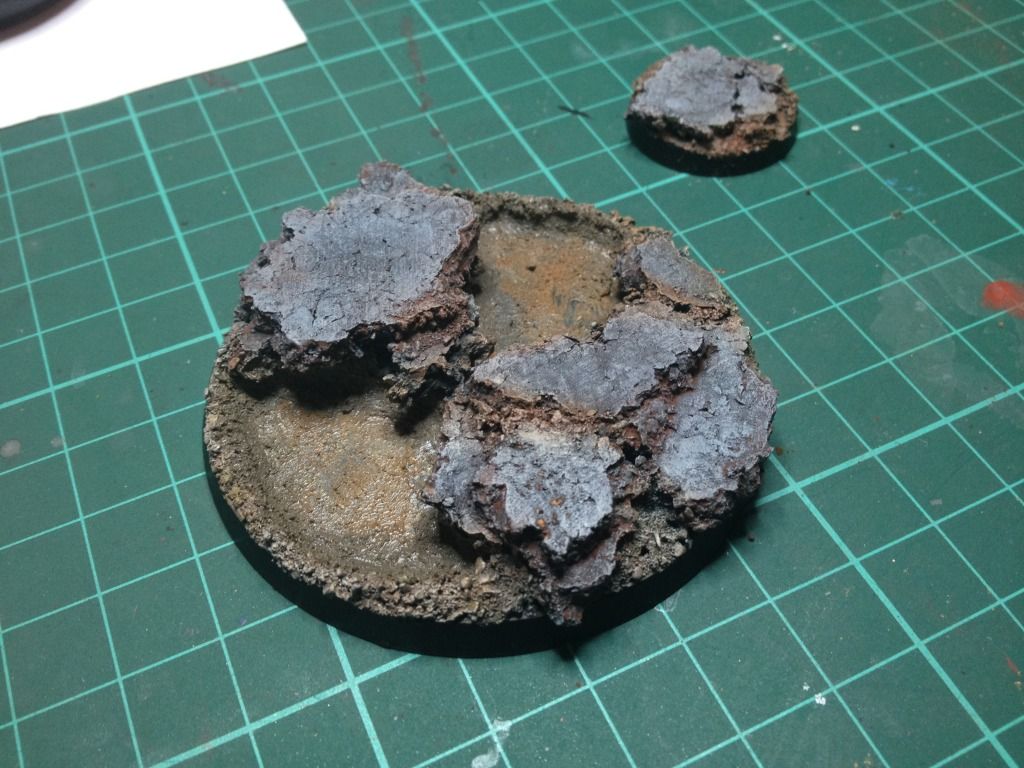
Finished most of the work required on the base last night in preparation to create the dirty water pools I am after. I have made sure that the depressions the mix will be poured into are water tight by filling around the edges with modelling putty and then once it has completely set putting a thin layer of PVA over the top of that and letting that dry. After that I have used Vallejo Sandy Paste, Brown Earth Paste and Dark Earth Paste to create a muddied effect at the bottom of the pool.
It currently looks like this
I now have two options to use for the dirty water effect.
The first is a two part crystal resin kit that I used to create the water effect in this mini base


Some experimentation might be needed before I try this on the base for real.
It currently looks like this
I now have two options to use for the dirty water effect.
The first is a two part crystal resin kit that I used to create the water effect in this mini base

That wasn't my most successful pour by the way :) I managed to tidy that up quite a bit....in fact I will post a pic of that mini (Malifaux December Cult Ice Golem) when I remember. Now personally that is too clear for the effect that I am after. I want something that looks more like a muddy puddle with an effect along these lines. (Image from http://www.ediorama.com)
Looks like it was created using this stuff.
Friday 5 October 2012
Furioso Dreadnaught WiP
Back before there was a Furioso model released that wasn't all metal and terrible I ran an ironclad as a Furioso. To be honest it works very well as one. Anyway it has had a repaint to fit in with the rest of the army. Pretty much done. It just needs a coat of Satin varnish now to bring down the gloss finish it was given before being oil washed. Then there will be some pigments applied around the engine exhausts and the feet to blend it in with the base. The base has had the two raised sections cut out and a circle of plasticard glued in underneath and then the gaps filled with revell model putty. I have then put in some debris for the dreadnaught to stand on and the two recessed areas will be filled to look like dirty water.

Tuesday 2 October 2012
Blood Angels JP Chaplain
One Blood Angels Chaplain done....well ish. The metalics need neatening up a little bit but otherwise he is ready to cleave skulls!

On a related note I am very near done with my Blood Angels now. I have one or two pieces to finish off but that will be a LOT of hardwork and painting time done.....then they can go on eBay and pay for something shiny and new :)

On a related note I am very near done with my Blood Angels now. I have one or two pieces to finish off but that will be a LOT of hardwork and painting time done.....then they can go on eBay and pay for something shiny and new :)
Subscribe to:
Posts (Atom)